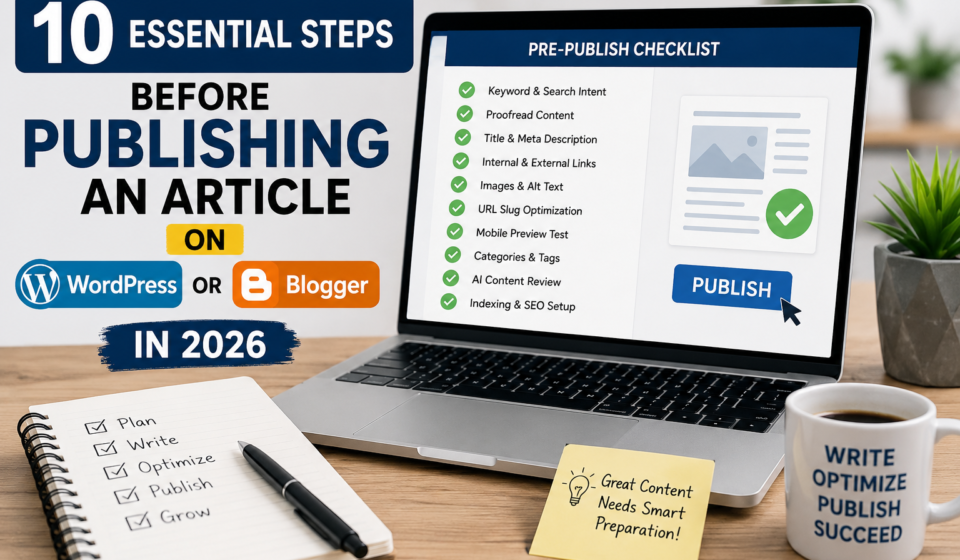

publishing an article on WordPress or Blogger
Publishing an article is easy. Publishing an article that actually ranks, reads well, and brings traffic is a different game. Many new bloggers write a post, hit “Publish,” and wait for traffic that never comes. The real work happens before you publish — not after.
In this guide, we will go through 10 major steps every blogger should take before publishing on WordPress or Blogger in 2026. These steps are simple, practical, and based on real blogging experience. No jargon, no fluff — just what actually works.
1. Confirm Your Keyword and Search Intent
Before publishing, ask yourself: what is my reader actually searching for?
Many bloggers pick a keyword but forget to match the search intent behind it. For example, if someone searches “best AI tools for students,” they want a list with comparisons — not a long story about AI history.
What to check:
- Does your title match what people are searching for?
- Is your content answering the main question in the first 100 words?
- Have you used the keyword naturally in the title, first paragraph, and at least one heading?
Search intent mismatch is one of the biggest reasons posts don’t rank, even with good keywords. Google rewards content that satisfies the reader, not just content that repeats a keyword.
If you’re not sure why your content isn’t performing well even after publishing, this guide on why your website is not getting organic traffic explains the common reasons in detail — search intent mismatch is right at the top of the list.
2. Proofread the Whole Article Twice
This step sounds basic, but it’s the one most people skip. A blog post full of spelling mistakes, broken sentences, or awkward grammar loses reader trust in seconds.
How to proofread properly:
- Read the article out loud. If it sounds strange, rewrite the sentence.
- Use free tools like Grammarly or the built-in spell checker in WordPress/Blogger.
- Take a 10-minute break after writing, then re-read with fresh eyes.
- Check for repeated words, missing full stops, and inconsistent tense (mixing past and present).
Proofreading twice — once right after writing, and once after a short break — catches almost all major errors. Don’t rely only on AI tools to fix grammar; always give it a final human read.
3. Write a Clear Title and Meta Description
Your title and meta description are what people see on Google before they even click. If these are weak, no one clicks — no matter how good your article is.
Title tips:
- Keep it under 60 characters so it doesn’t get cut off in search results.
- Include your main keyword close to the beginning.
- Add numbers or power words when relevant (“10 Steps,” “Complete Guide,” “2026”).
Meta description tips:
- Keep it under 160 characters.
- Include your main keyword naturally.
- Write it like a mini pitch — tell the reader exactly what they’ll get if they click.
A good title and meta description can double your click-through rate even if your ranking position stays the same.
4. Fix Broken Links and Add Internal Links
Before publishing, check every single link in your article. Broken links hurt user experience and can hurt your SEO too, since Google notices when a site has many dead links.
Two things to check:
- External links — Do they still work? Do they open in a new tab? Are they pointing to trustworthy sources?
- Internal links — Have you linked to your own related articles?
Internal linking is one of the most underrated SEO tactics. It keeps readers on your site longer, helps Google understand your site structure, and passes ranking authority between your pages.
For example, if you’re writing about SEO or blogging tips, you could naturally link to a guide like why your website is not getting organic traffic or a resource on common errors during and after publishing a blog post. This gives readers more value and keeps them exploring your site instead of leaving.
Rule of thumb: add 2-4 internal links per article, and make sure they are relevant to the topic — don’t force links just to add them.
5. Optimize Every Image Before Uploading
Images make articles more engaging, but unoptimized images slow your site down — and page speed directly affects both rankings and user experience.
Before uploading any image, do this:
- Compress it. Use free tools like TinyPNG or Squoosh to reduce file size without losing quality.
- Rename the file. Instead of “IMG_2093.jpg,” rename it to something like “seo-tips-for-beginners.jpg.”
- Add alt text. Alt text should describe the image and include your keyword naturally — this helps with image SEO and accessibility for visually impaired readers.
- Use the right format. WebP images load faster than JPEG or PNG in most cases.
- Avoid oversized dimensions. Don’t upload a 4000px-wide image when your blog only displays it at 800px.
A page full of large, unoptimized images is one of the most common reasons blogs load slowly — and slow blogs lose both readers and rankings.
6. Set a Clean, Keyword-Focused URL Slug
Your URL slug (the part after your domain name) matters more than most beginners realize. A clean slug is easier for Google to understand and easier for readers to remember or share.
Good slug practices:
- Keep it short — ideally under 6-8 words.
- Include your main keyword.
- Remove unnecessary stop words like “the,” “a,” “of,” “and.”
- Use hyphens between words, not underscores.
Example:
- Bad slug:
/the-complete-guide-to-how-you-can-make-money-online-in-2026-easily/ - Good slug:
/make-money-online-2026/
Both WordPress and Blogger let you edit the URL before publishing — always check and clean it up manually, since the default auto-generated slug is often too long.
7. Preview and Test Mobile Formatting
Most blog readers today are on mobile phones, not desktops. If your article looks messy on mobile — text too small, images overflowing, huge paragraph blocks — readers will bounce within seconds.
Before publishing, check:
- Paragraph length (keep paragraphs short — 2-3 sentences max for mobile readability)
- Font size and spacing
- Whether images resize properly on smaller screens
- Whether tables or embedded content (like YouTube videos) display correctly
- Loading speed on mobile
Both WordPress and Blogger have a “Preview” button — always use it and actually open the preview on your own phone before hitting publish. Don’t just trust the desktop editor view.
8. Double-Check for Common Publishing Mistakes
Even experienced bloggers make small mistakes that hurt their post’s performance. Before publishing, run through this quick checklist:
- Did you set a featured image?
- Did you assign the correct category and tags?
- Did you add a table of contents for longer articles?
- Is your permalink/slug finalized (not still showing the default draft number)?
- Did you check for duplicate content from another post on your own site?
- Is your call-to-action (CTA) clear — do you tell the reader what to do next?
These small details are easy to overlook when you’re focused on writing. Missing a featured image or forgetting to set the right category can make a post look unfinished, even if the content itself is great.
For a full breakdown of mistakes bloggers commonly make right before and after hitting publish, this guide on common errors during and after publishing a blog post covers it in detail — it’s worth a quick read before you publish your next article.
9. Review AI-Assisted Content Carefully
In 2026, a huge number of blog posts are written with the help of AI tools. There’s nothing wrong with using AI — but publishing raw AI output without review is a mistake that can hurt both readability and rankings.
Before publishing AI-assisted content:
- Read through and remove repetitive phrases or robotic-sounding sentences.
- Add your own personal experience, examples, or opinions — this is what makes content stand out.
- Break up long AI-generated paragraphs into shorter, more natural ones.
- Fact-check any claims, statistics, or numbers the AI included.
A lot of bloggers also worry about whether Google can tell their content was AI-written. This guide on can Google detect AI content explains what actually matters — Google cares more about content quality and usefulness than whether AI helped write it.
If you want your AI-assisted drafts to read more naturally before publishing, this guide on how to humanize AI generated content the SEO-safe way walks through practical editing techniques.
10. Get Ready to Index Your Post Fast
Publishing is not the finish line — getting your post indexed by Google quickly is the real goal. A post that sits unindexed for weeks won’t get any organic traffic, no matter how good it is.
Before and right after publishing:
- Make sure your sitemap is updated and submitted in Google Search Console.
- Manually submit the new URL for indexing in Search Console.
- Share the post on social media and relevant communities to generate early traffic signals.
- Add 1-2 internal links from older, already-indexed posts pointing to your new article.
If you’re new to this process or your posts are taking too long to get indexed, this step-by-step guide on how to get a new blog indexed by Google fast walks through the exact process that works in 2026.
Final Checklist Before You Hit Publish
Here’s a quick summary you can use every time before publishing:
- Keyword and search intent checked
- Proofread twice
- Title and meta description finalized
- Links checked (broken links fixed, internal links added)
- Images compressed with alt text
- URL slug cleaned up
- Mobile preview tested
- Featured image, category, and tags set
- AI content reviewed and humanized
- Sitemap updated and post submitted for indexing
Following this checklist takes maybe 15-20 extra minutes per post — but it’s the difference between an article that quietly disappears and one that actually ranks, gets read, and builds your blog over time.
Blogging in 2026 is more competitive than ever, but bloggers who follow a proper pre-publishing process consistently outperform those who just write and publish without a plan. Make this checklist part of your routine, and you’ll notice the difference within a few months.